shopjeshas.com
Beginner Sourdough Bread Recipe
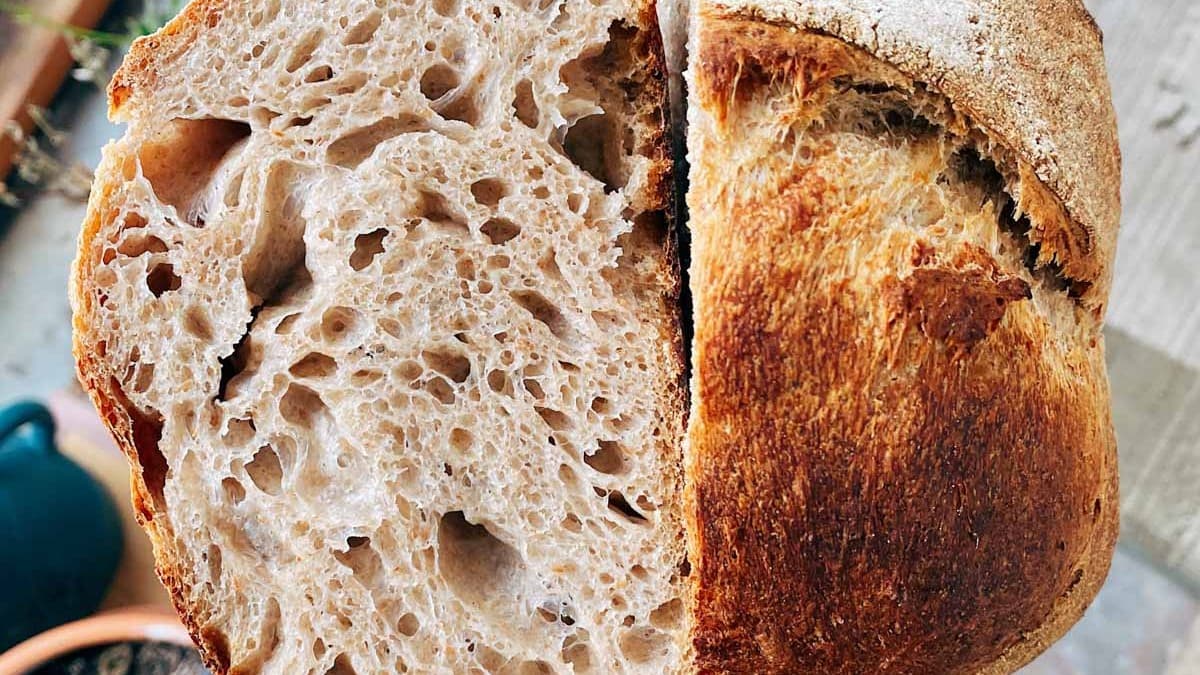
This beginner sourdough bread recipe will show you how to make delicious and nourishing whole grain sourdough bread with a beautiful open crumb, superb flavor, and chewy texture. Note: You will need your own sourdough starter for this one!
Prep
—
Cook
36h
Total
36h
Serves
12
Instructions
- 01
Step 1: Feed Your Starter, 9pmYou'll want to feed your starter about 8-12 hours before you plan to mix all of the ingredients together. Since this recipe calls for 100g of active, bubbly starter, it makes sense to feed at least 70 grams of water and 70g of flour the night before if you're planning to mix the following morning. You'll remove 100g the next day for this recipe, and you should have just enough on hand to refeed to maintain your starter.
- 02
Step 2: Autolyse, 8amIn a large bowl or Tupperware, combine 450g of Half White Flour, 50g of Whole Grain Spelt Flour, and 375g of water. Using your hands, mix the ingredients together until the dough fully absorbs the water. This will only take a couple of minutes, and there should be no dry patches left when you're done. When you're finished mixing, cover with a towel, plastic wrap, or use a lid if it's in a plastic or glass Tupperware. Let the dough rest for at least 30 minutes and up to 4 hours.
- 03
Step 3: Mix, 9amAfter you've let the dough rest on its own for anywhere from 30 minutes to 4 hours, add 100g of active bubbly sourdough starter and mix it in with your hands. Once the starter is thoroughly incorporated, perform stretch and folds for 3-5 minutes. You want to stop when the dough feels smooth and it becomes difficult to stretch out. This process helps further develop the gluten structure and improves elasticity. Here's a great video showing how to perform strong stretch and folds. After you're done, add in all of the salt and the remaining 25g of water. Pinch in the salt until it's fully dissolved into the dough. Perform 4 more stretch and folds to ensure the salt is thoroughly distributed.
- 04
Step 4: Bulk Fermentation, 9:10amBulk fermentation is simply the process of letting your dough ferment at room temperature. It usually takes about 3-5 hours, but it can vary depending on the temperature of your home and the strength of your starter. For this step, you're going to perform 4-5 sets of stretch and folds every 30-45 minutes. In the beginning, we really want to work the dough and build structure, so focus on strong stretch and folds, as shown in the video above. As the hours go by and the dough becomes stronger and more voluminous, begin to perform more gentle stretch and folds. Here's a great video showing how to do soft stretch and folds. You'll notice that the dough is bubbly and airy at this point.The bulk fermentation is done when the dough has significantly increased in size, air bubbles form on top, and air pockets on the sides and bottom. You can also perform the poke test. If you poke the dough gently with your index finger and it bounces back, retaining its original shape in the affected spot, it's a sign your dough is ready.
- 05
Step 5: Pre-shape, 1:10pmNot gonna lie, I skip this step all the time. But, if you want to go all out, pre-shaping is an excellent way to continue to build the structure of your dough – there's a reason why dedicated bakers always include it as part of the bread-making process. But we're not perfectionists, and sometimes you gotta skip it. Other times you just forget entirely. That's fine too. On to the pre-shape! Carefully dump out your dough onto a work surface (not floured, we want it to be a little sticky) by flipping your bowl or Tupperware upside down and letting it all plop out. The main goal with the pre-shape is to gently form the dough into a tight ball by turning it and tucking under, turning, and tucking under. The whole time using the friction of the table to create tension in the dough. Here is an excellent pre-shaping video from The Perfect Loaf.After you're done preshaping, let the dough rest for 20 to 30 minutes.
- 06
Step 6: Shape, 1:30pmFirst, you'll want to prepare your proofing basket. You can use a regular kitchen bowl, a round bread basket, a long breadbasket, Tupperware, etc. The options are endless. Sometimes I even use just a 9’’x5" loaf pan. The main idea here is to pick something that will fit the entire dough inside but is small enough to retain its shape. Line your proofing vessel of choice with a kitchen towel or liner if you have one, and lightly dust with flour. Lightly flour your work surface, and sprinkle a little bit of flour on top of the dough as well. Flip the dough over, laying the flour side down on the counter. Grab the right two corners of the dough and fold them up and over the middle to form a one-third fold. Grab the left two corners and fold them up and over the middle, layered on top of the fold you just created with the right side. Your dough should look like a long rectangular-ish shape. Starting from the top, grab the dough and fold it over itself about a quarter of the way down. Repeat this fold until you reach the bottom – it's sort of like rolling up a sleeping bag. Here's an excellent video that breaks it down far better than my words ever could. When you're done, pick up the dough and place it in the proofing basket, upside down, with the newly created seam facing up. Here's a great shaping video for reference.
- 07
Step 7: Proof, 1:35pmNow it's time to lay your dough baby to rest and pop her in the fridge. First, you'll need to cover it to prevent the exterior of the dough from drying out. It's pretty standard for bakers to use a plastic ziplock bag or a dampened cloth. After you've covered the dough, place it in the fridge and let it hang out there for anywhere from 12 to 24 hours.
- 08
Step 8: Score and Bake! 8amPlace your Dutch oven into your oven and preheat to 500 degrees. When the oven is preheated, remove your dough from the fridge. Cover your Tupperware/bread basket with a piece of parchment paper, and then place a cutting board over the parchment paper. While holding the parchment paper and cutting board against the Tupperware, flip it over and allow the dough to turn out. Full disclosure, scoring takes practice. Using a scoring knife, gently score your bread at a 45-degree angle, cutting just below the skin that has formed on the outer layer of the dough. This step will allow gases to escape while the bread bakes and prevent it from cracking in unpredictable ways. By scoring, we have greater control of the final product. Here's a helpful video from Breadtopia on how to score a boule (tip: you don't need to do a full cross-section like they do in the video. I just do one straight line and call it a day)/Quickly remove your Dutch oven from the oven while being mindful of letting as little heat escape as possible. Lifting from the parchment paper edges, place your dough in the Dutch oven, add the lid, and bake at 500 for 20 minutes. After 20 minutes, remove the lid, and lower the temp to 450. Continue baking for another 20 - 30 minutes. The bread is done when the crust is a beautiful golden brown and the internal temp is about 208-210 degrees. Allow the bread to fully cool (at least one hour) before slicing into it.
Free · No ads
Save this recipe to your own library.
iCook.ing is a free recipe library. Create an account in 10 seconds to save this recipe, plan your week, and head to the store with one shopping list.
Save from anywhere
Paste a link from a recipe blog, Instagram, TikTok, Facebook, or Pinterest — we pull the ingredients, steps, and photo.
Plan your week
Drag recipes onto a weekly plan, scale for the number of people you're feeding, and never wonder what's for dinner.
One shopping list
Your plan rolls up into a single, de-duplicated shopping list — sorted by aisle so the store run is faster.
Cook, don't scroll
Big, screen-stays-awake cook mode with built-in timers. No ads. No life story above the recipe.