foodnouveau.com
Classic Gnocchi from Scratch
Making classic gnocchi from scratch is so satisfying: once you master these plump little bites, you won't ever buy them from the store again!
Prep
30 min
Cook
15 min
Total
1h
Serves
6
Instructions
- 01
Wash the potatoes thoroughly without peeling them. Boiling potatoes with the peel on prevents excess water to penetrates the flesh while they’re cooking. Bring a large pot of water to a boil. Use an exact cooking time and avoid piercing the potatoes during cooking as this will allow water to get in. Small potatoes take 10–15 minutes to boil; medium 20–25 minutes; large 35–45 minutes. If you’re unsure about your cooking time, boil one extra potato that you’ll use to test for doneness.
- 02
Once the potatoes are cooked, drain them and let them rest until cool enough to handle.Peel the potatoes, then transfer them to a large bowl. Mash the potatoes: a potato ricer is the best rool to create a super smooth potato puree, but you can also use a potato masher or a fork. Make extra sure to eliminate all lumps in the puree.
- 03
Let the mashed potatoes cool to room temperature.
- 04
Add the egg yolks and olive to the mashed potatoes, and mix to combine. In a small bowl, mix the flour and salt together. Sprinkle the flour mixture over the mashed potato mixture and mix gently until the flour is moistened and the dough looks crumbly.
- 05
Lightly flour a work surface. Transfer the dough to the working surface. Knead it gently to incorporate the flour: press on the dough with your hands, fold it in half, turn it by a quarter turn and press it again. Do not over-knead the gnocchi dough: you should do this for just about 1 minute, until the dough feels soft and smooth.
- 06
If the dough sticks to the work surface, sprinkle a bit more flour—but keep in mind that you must limit the amount of flour you add to the gnocchi to make sure they don’t become heavy and dense.
- 07
When the gnocchi dough is ready, put it in a bowl and cover with a clean kitchen towel.
- 08
Clean the work surface, then dry it thoroughly and lightly sprinkle with flour. Tear off a lemon-sized piece of dough and roll it into a rope about 3/4 in (2 cm) in diameter). Use a knife to cut the rope of gnocchi dough into square bites.
- 09
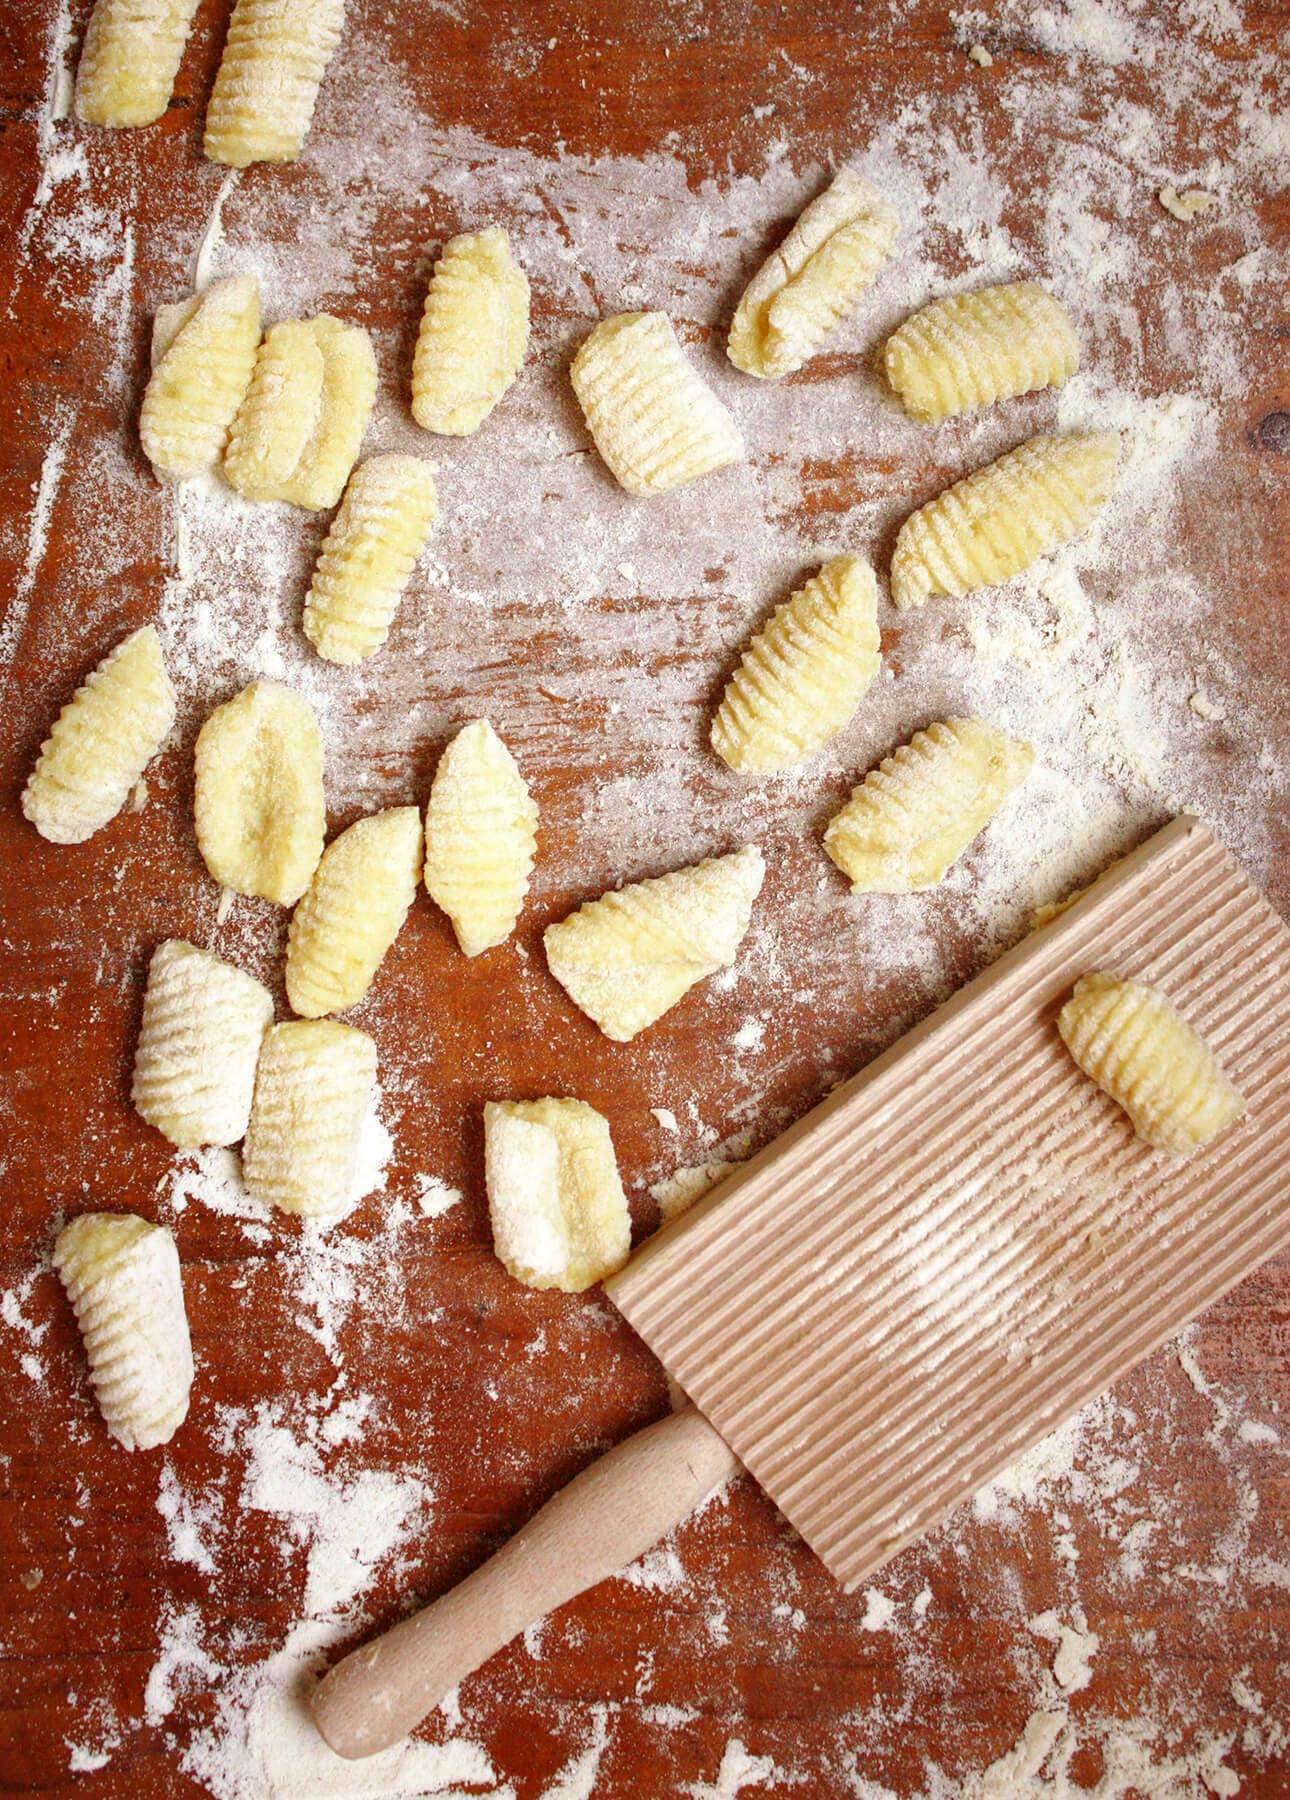
You now have two options: you can either leave the gnocchi plain, looking like miniature pillows, or indent them using a gnocchi board or a fork.
- 10
Leaving homemade gnocchi plain is good to fry them in butter, or serve them simply tossed into brown butter.
- 11
Indenting gnocchi is ideal if you plan to serve them with a sauce, because the pattern allows the sauce to better cling to the gnocchi.
- 12
To indent gnocchi you can use either a gnocchi board or a fork. Pick up one square piece of gnocchi dough and use your thumb you gently roll it over the gnocchi board or the back of the fork to create grooves in the dough. Repeat to roll all the gnocchi. As you roll, transfer them to a parchment paper-lined baking sheet in a single layer, making sure they don’t touch. Homemade gnocchi are best cooked within 2–3 hours of being made. Keep the gnocchi at room temperature until ready to cook.
- 13
FREEZING TIPS: Transfer the baking sheet with the homemade gnocchi straight to the freezer. Once the gnocchi are frozen hard, transfer them to freezer bags in portion sizes. They will keep frozen for up two months.
- 14
Bring a large pot of salted water to a rolling boil. Drop 12 to 15 gnocchi into the water at once and wait until they come back to the surface on their own. When they do, they’re ready. Keep a close eye on homemade gnocchi while they cook because it only takes about 2 minutes!As soon as the gnocchi float back to the surface, use a slotted spoon to fish them out. Transfer the cooked gnocchi to a bowl and cover with plastic wrap to keep them warm. Repeat until all the gnocchi are cooked.
- 15
SERVING: In a skillet set over medium heat, warm up the sauce of your choice, then add the gnocchi and toss just to combine. Serve immediately.
- 16
MAKE IT GLUTEN FREE: Use a gluten-free all purpose flour mix instead of regular all-purpose flour.
- 17
Recipe Credit: Adapted from Eleonora Baldwin's tried-and-true family recipe.
Free · No ads
Save this recipe to your own library.
iCook.ing is a free recipe library. Create an account in 10 seconds to save this recipe, plan your week, and head to the store with one shopping list.
Save from anywhere
Paste a link from a recipe blog, Instagram, TikTok, Facebook, or Pinterest — we pull the ingredients, steps, and photo.
Plan your week
Drag recipes onto a weekly plan, scale for the number of people you're feeding, and never wonder what's for dinner.
One shopping list
Your plan rolls up into a single, de-duplicated shopping list — sorted by aisle so the store run is faster.
Cook, don't scroll
Big, screen-stays-awake cook mode with built-in timers. No ads. No life story above the recipe.