brianlagerstrom.com
Easiest Actually Good Sourdough Bread
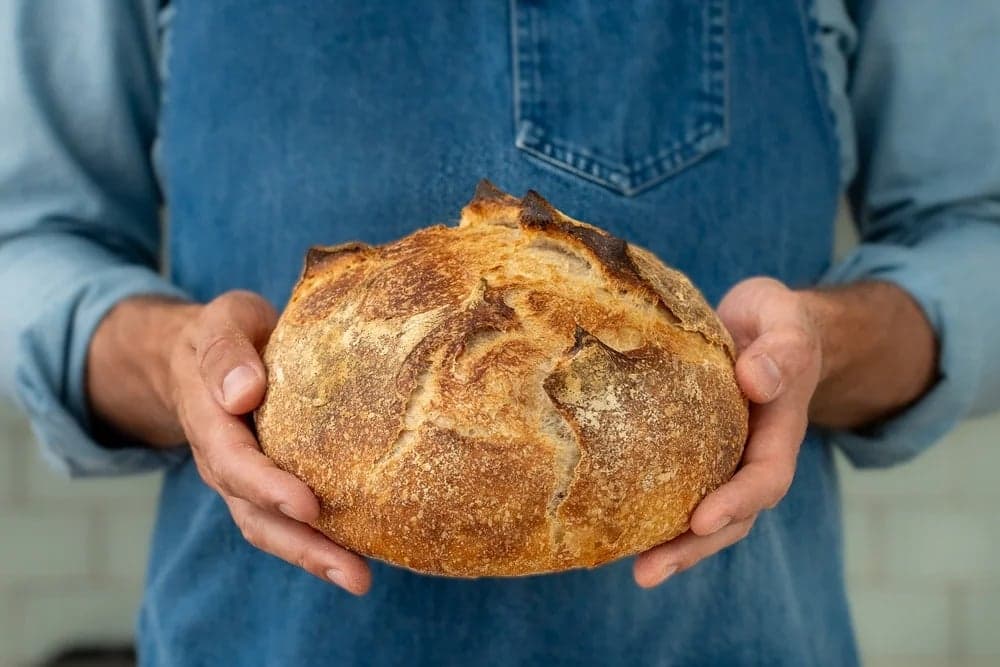
This is hands down the easiest method to make sourdough bread that's actually good. It's a no-mixer sourdough bread recipe that produces a deeply browned crust, chewy open crumb, and mild tang.
Prep
20 min
Cook
40 min
Total
18h
Serves
1
Instructions
- 01
In a bowl, mix 100g of the 90°F/32℃ water with 25g ripe sourdough starter.
- 02
Add 100g bread flour to the mixture and stir until well combined and no lumps remain.
- 03
Cover the bowl and let it sit at room temperature for 12-14 hours. The leaven should become frothy, bubbly, and increase in size.
- 04
In a mixing bowl, combine 275g 92°F/32℃ water with all of the ripe leaven. Stir until the leaven is dissolved in the water.
- 05
Add 400g bread flour, 50g whole wheat flour, and 12g salt to the mixture.
- 06
Use a sturdy spoon to mix the ingredients until a dry clump forms. Then, wet your hand and use it to squeeze and fold the dough until it is homogeneous and there are no dry spots.
- 07
First Rest: Cover the bowl and let the dough rest for 30 minutes.
- 08
First Fold: After 30 minutes, grab a portion of the dough near one side, stretch it until you feel resistance, then fold it over across to the other side of the bowl. Repeat 5-6 times, then flip the dough seam side down and round it into a ball. Cover and let rest (a second time) for another 30 minutes.
- 09
Second Fold/Final Ferment: Repeat the folding process one more time after the second 30-minute rest. After this, cover the dough and place it in a warm spot to ferment for 2 more hours.
- 10
Lightly flour a cutting board and flip the dough out onto the floured surface. Grab opposite sides of the dough, pull them out, and fold over each other toward the center. Rotate the dough and repeat 4-6 times.
- 11
Flip the dough over onto the folds and round it while stretching the top down and under to create tension.
- 12
If using a proofing basket, dust it with flour. If using a bowl, line it with a tea towel (kitchen towel) and dust with flour.
- 13
Place the shaped dough seam side up in the basket. Give it a few more pull out and folds as shown in the video to create added tension.
- 14
Cover and let proof in a warm place for 60-90 minutes.
- 15
After 60-90 minutes, the dough should have increased in size by about 60%. To test, gently poke the dough; if it slowly bounces back, it is ready to bake. Judge proofing by the way the dough looks, reacts to the poke not the time. Proofing in a cool room will take much longer than in a warm room.
- 16
Preheat your oven to 450°F/232°C
- 17
Prepare for Baking: Flip the dough onto a parchment-lined sheet tray.
- 18
Score the Dough: Use scissors to make 5-6 overlapping snips on the top of the dough.
- 19
Create Steam: Spray the dough 6-10 times with water and cover with a foil pan lid.
- 20
Initial Bake: Bake covered for 15 minutes.
- 21
Final bake: Uncover and Continue Baking: Remove the foil lid, add a wire rack to baking sheet, and bake for an additional 30 minutes.
- 22
Preheat your Dutch oven in a 475°F/245°C oven.
- 23
Carefully flip the proofed dough onto a piece of parchment paper sprinkled with semolina flour.
- 24
Use scissors to make 5-6 angled snips on the dough.
- 25
Initial bake: Place the dough and parchment paper into the preheated Dutch oven, cover with the lid, and bake for 15 minutes.
- 26
Final bake: Remove the lid and bake for an additional 20-25 minutes.
Variations & swaps
Key Ingredient Notes & Substitutions
- These are some of the important ingredients I want to bring your attention to in this recipe. The full list of ingredients and amounts are listed in the recipe card below.
- Ripe Sourdough StarterThis is non-negotiable. The leaven only works if your starter is actively fermenting. That means it’s been fed 10–12 hours before you build the leaven and has visibly risen.
- If you’re baking often: Feed twice a day at room temperature. To feed, discard down to ~50g, then add 50g water and 50g flour.
- If you’re not baking often: Stash the starter in the fridge and feed it once a week. Pull it out two days before baking, keep at room temperature, and give it two feedings to wake it up.
- Bread Flour (12.7% Protein)Bread flour is the backbone here. I use flour that’s around 12.5 to 13.5% protein, and that extra protein gives the dough the potential to build a strong, well-integrated gluten network. I typically use Bob’s Red Mill for reliable results.
- All-purpose flour works in a pinch, but the loaf will be harder to shape, especially for beginners. That’s because lower-protein dough feels stickier in your hands. It takes a more experienced touch to shape all-purpose dough into a strong loaf that holds itself up during baking.
- Warm Water (92°F / 33°C)Water is the most underrated sourdough “ingredient”. Using warm water (92 to 95°F / 34°C) will yield a final dough temp of 78 to 82°F (26°C) , which is where the wild yeast in your starter likes to ferment. Tepid or chilly water is one of the easiest ways to get frustrated with sourdough and quit. Water below 78°F can leave you with dough in the low 70s or even the 60s,…
Free · No ads
Save this recipe to your own library.
iCook.ing is a free recipe library. Create an account in 10 seconds to save this recipe, plan your week, and head to the store with one shopping list.
Save from anywhere
Paste a link from a recipe blog, Instagram, TikTok, Facebook, or Pinterest — we pull the ingredients, steps, and photo.
Plan your week
Drag recipes onto a weekly plan, scale for the number of people you're feeding, and never wonder what's for dinner.
One shopping list
Your plan rolls up into a single, de-duplicated shopping list — sorted by aisle so the store run is faster.
Cook, don't scroll
Big, screen-stays-awake cook mode with built-in timers. No ads. No life story above the recipe.