preppykitchen.com
Sourdough Bread Recipe
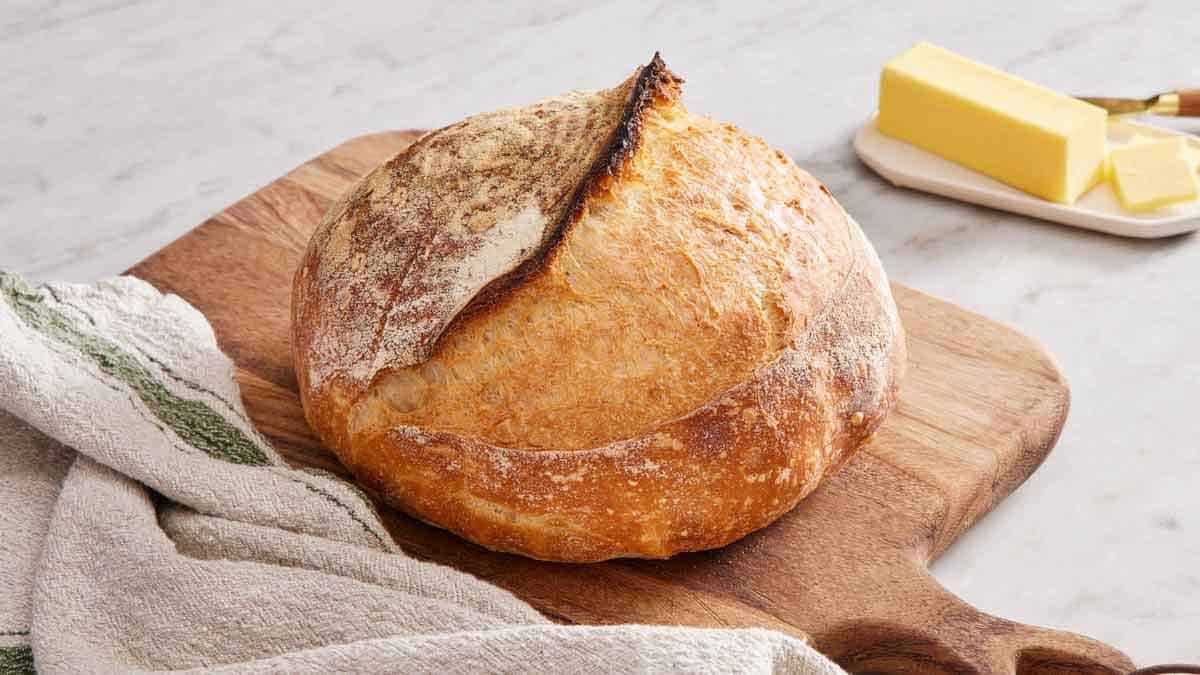
Four ingredients and no kneading. A crackling crust, an open chewy crumb, and timings that tell you what to look for instead of just how long to wait.
Prep
9h
Cook
40 min
Total
9h 40m
Serves
1
Instructions
- 01
In a large metal or glass bowl, whisk together the water and starter until mostly combined. Add the flour and salt. Stir together by hand or with a spatula until the mixture is very shaggy but most of the flour is mixed in.
- 02
Cover with a damp kitchen towel or plastic wrap and let it sit at room temperature for 1 hour. (This helps with flavor and kick-starts gluten development.)
- 03
Fill a bowl or measuring cup with several inches of cold water. Uncover your dough.
- 04
With the dough bowl directly in front of you, dip your fingers into the water, and then slide them under one edge of the dough down to the bottom of the bowl. (I like to start at the top of the bowl, or 12 o’clock.) Pull that section of dough up, stretch it over the center, and press it down into the dough to help hold it in place. Turn the bowl 90°, or a quarter turn, and repeat 3 more times until you’ve made 4 folds and turns.
- 05
Recover the bowl and rest for another 20 minutes.
- 06
Repeat the stretch and fold process again. At this point, you can repeat the stretch and fold sequence two more times or you can move on to the rise. (Continuing to stretch and fold will develop a stronger gluten structure resulting in a chewier loaf with a more even crumb structure inside. The flavor and texture will be great either way, so it’s up to your preference and time!)
- 07
After the final stretch and fold, shape your dough into a ball. If your bowl is crusted with flour, scrape it clean or transfer your dough to another bowl. Cover and let the dough rise until well puffed, 6 to 12 hours, ideally in a place that is 68°F to 75°F. (See notes on Bulke Rise Time.)
- 08
To test if the dough has risen enough, dip your finger in flour and poke the top of the dough. If it mostly springs back, it’s ready! If it holds the indentation without any movement or feels very dense, continue letting it proof and test it every hour. If it looks deflated or very soft, it is likely over-proofed; I’d still continue and bake it! It may bake up flatter but should still taste great.
- 09
Stretch: Dip both hands in cold water. Slip your fingers under the dough on either side and lift the dough up about a foot or two above the counter. It should essentially be draped over your hands. (If the dough is sticking to the bowl, use a dough scraper or a spatula to loosen it.) Place it on the counter.
- 10
Pinch: Sprinkle the top of the dough lightly with flour, and flip it over so the floured side is down. Pinch all of the edges into the center, like you are bundling up a sack.
- 11
Shape: Flip the dough over so the seams are on the counter. With your hands cupped around the top of the loaf, gently pull the dough ball towards you, tightening the shape. Continue this motion by rotating the dough so that the edges are tightened all around and it forms a nice ball. (You will do this 8-10 times to form a good, tight ball.) Lightly dust the ball with flour.
- 12
Line a bowl or colander with a clean smooth kitchen towel and dust generously with flour. With the help of your dough or bench scraper, carefully pick up the dough ball and flip it over, so the top or smooth side is down in the towel. Cover and rise at room temperature for 30 minutes. (You can also place the dough in a large plastic bag and seal it, then refrigerate for up to 36 hours. The cold slows the rise and ages the yeast, resulting in a more sour, deeper flavored loaf.)
- 13
After the 30-minute rise, place the loaf in the refrigerator while the oven preheats (at least 1 hour).
- 14
Place a large cast-iron Dutch oven or large heavy-duty oven-safe pot with the lid on in the oven. Preheat the oven to 500°F for 1 hour. (If you have chilled your loaf for more than 1 hour, remove it from the refrigerator while the oven preheats.)
- 15
When ready to bake, remove the loaf from the fridge. Uncover and lightly flour the loaf. Place a piece of parchment paper on top of the bowl and a baking sheet over that. Invert so that the dough falls onto the paper. Remove the bowl and towel.
- 16
Using a sharp knife or razor blade, make a shallow cut down the length of the loaf or cut in a decorative design.
- 17
Carefully remove the pot from the oven. Using the parchment paper as handles, place the loaf inside the pot and cover with the lid. (If the parchment is hanging out of the pot, just firmly press the lid down to seal it.)
- 18
Bake for 20 minutes. Reduce the oven temperature to 450°F.
- 19
Carefully remove the lid and continue baking until the crust is a deep golden brown or the internal temperature is 195°F to 205°F, about 20 minutes more. Use the parchment and a spatula to lift the bread out of the pot and place the loaf on a wire rack to cool completely before slicing.
Nutrition
per serving · 1 serving
- Calories
- 1914
- Protein
- 63g
- Carbs
- 386g
- Fat
- 9g
- Fiber
- 13g
- Sugar
- 2g
- Sat. fat
- 1g
- Sodium
- 6229mg
Free · No ads
Save this recipe to your own library.
iCook.ing is a free recipe library. Create an account in 10 seconds to save this recipe, plan your week, and head to the store with one shopping list.
Save from anywhere
Paste a link from a recipe blog, Instagram, TikTok, Facebook, or Pinterest — we pull the ingredients, steps, and photo.
Plan your week
Drag recipes onto a weekly plan, scale for the number of people you're feeding, and never wonder what's for dinner.
One shopping list
Your plan rolls up into a single, de-duplicated shopping list — sorted by aisle so the store run is faster.
Cook, don't scroll
Big, screen-stays-awake cook mode with built-in timers. No ads. No life story above the recipe.